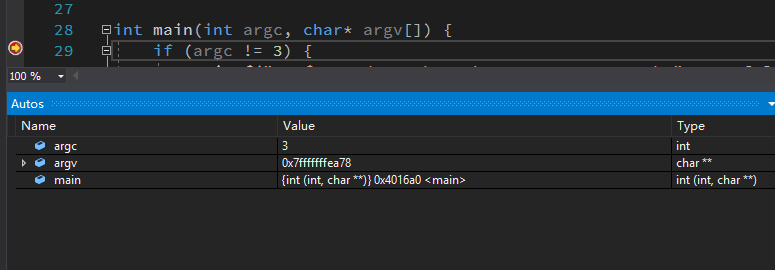
Visual Studio 2017 远程编译调试 Linux 上已存在的通过 Samba 共享的 CMake 工程
安装配置 Samba
通过如下命令安装 samba
sudo yum -y install samba
然后编辑配置文件 /etc/samba/smb.conf,将 browseable 置为 yes:
[homes]
        comment = Home Directories
        valid users = %S, %D%w%S
        browseable = Yes
        read only = No
        inherit acls = Yes
添加防火墙规则:
RHEL/CentOS 6.x:
~]# iptables -I INPUT -p udp -m multiport  --dport 137,138 -j ACCEPT
~]# iptables -I INPUT -p tcp -m state --state NEW -m multiport --dport 139,445 -j ACCEPT

~]# service iptables save
RHEL/CentOS 7.x:
~]# firewall-cmd --permanent --add-port={139/tcp,445/tcp}
~]# firewall-cmd --reload
启动 samba 服务:
RHEL/CentOS 6.x:
~]# chkconfig  smb on
~]# service smb restart
RHEL/CentOS 7.x:
~]# systemctl enable smb
~]# systemctl start smb
添加 samba 用户,此用户必须在 Linux 系统中存在:
~]# smbpasswd -a example
New SMB password: password
Retype new SMB password: password
Added user example.

~]# smbpasswd -e example
Visual Studio 2017 工程配置
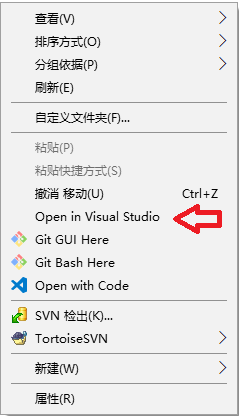
通过 Samba 打开 Linux 上的工程目录,点击鼠标右键,选择 Open in Visual Studio :
打开 Visual Studio 2017 后会提示如下窗口,这个是因为通过 Samba 创建的 .vs 目录权限不足,无法生成索引,如果点击 OK 则会在 Windows 本地生成索引,这里选择 Cancel ,然后退出 Visual Studio 2017 :
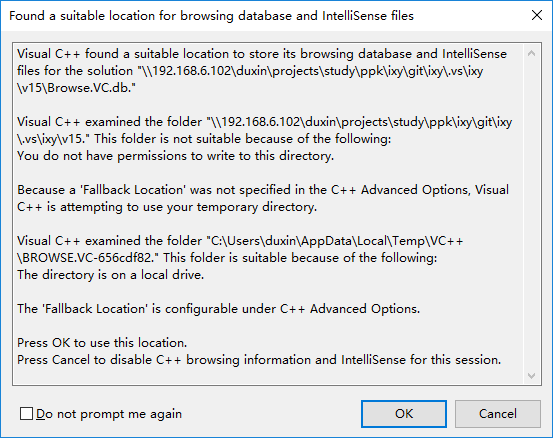
退出后,在 Linux 上的工程目录中执行如下命令,在 .vs 目录上添加权限:
]$ chmod 777 -R .vs
然后再通过 Samba 打开 Linux 上的工程目录,鼠标右键打开 Visual Studio 2017,在上方的下拉框中选择 Manage Configurations ... :
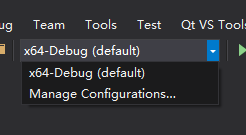
在弹出的对话框中选择 Linux-Debug:
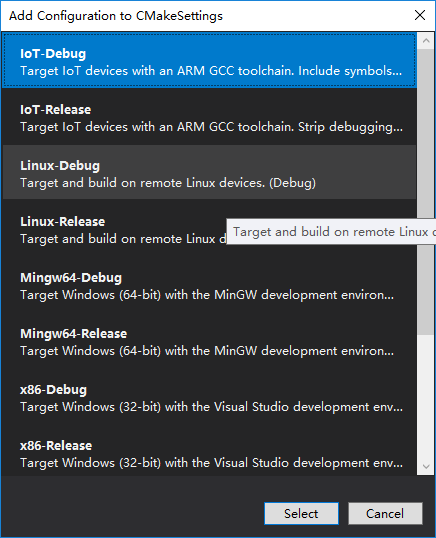
然后会在工程目录生成一个配置文件 CMakeSettings.json,默认配置如下 :
{
  "configurations": [
    {
      "name": "Linux-Debug",
      "generator": "Unix Makefiles",
      "remoteMachineName": "${defaultRemoteMachineName}",
      "configurationType": "Debug",
      "remoteCMakeListsRoot": "/var/tmp/src/${workspaceHash}/${name}",
      "cmakeExecutable": "/usr/local/bin/cmake",
      "buildRoot": "${env.USERPROFILE}\\CMakeBuilds\\${workspaceHash}\\build\\${name}",
      "installRoot": "${env.USERPROFILE}\\CMakeBuilds\\${workspaceHash}\\install\\${name}",
      "remoteBuildRoot": "/var/tmp/build/${workspaceHash}/build/${name}",
      "remoteInstallRoot": "/var/tmp/build/${workspaceHash}/install/${name}",
      "remoteCopySources": true,
      "remoteCopySourcesOutputVerbosity": "Normal",
      "remoteCopySourcesConcurrentCopies": "10",
      "remoteCopySourcesMethod": "rsync",
      "remoteCopySourcesExclusionList": [
        ".vs",
        ".git"
      ],
      "rsyncCommandArgs": "-t --delete --delete-excluded",
      "remoteCopyBuildOutput": false,
      "cmakeCommandArgs": "",
      "buildCommandArgs": "",
      "ctestCommandArgs": "",
      "inheritEnvironments": [
        "linux_x64"
      ]
    }
  ]
}
但默认配置还不能使用,我们需要修改一些参数:
remoteCopySources配置成false,因为我们是通过 samba 共享的工程,所以不需要同步代码。generator置空,这应该是 vs2017 linux 插件的 bug,如果使用 默认配置,无法成功。remoteCMakeListsRoot,配置成工程在 linux 上的绝对目录。buildRoot、installRoot,置空。remoteBuildRoot,CMake 编译工程目录remoteInstallRoot,CMake 安装目录
配置完成后,在 Linux 上的工程 build 目录 执行 cmake <projects path>,例如:
]$ cmake ..
-- The C compiler identification is GNU 4.8.5
-- The CXX compiler identification is GNU 4.8.5
-- Check for working C compiler: /usr/bin/cc
-- Check for working C compiler: /usr/bin/cc -- works
-- Detecting C compiler ABI info
-- Detecting C compiler ABI info - done
-- Detecting C compile features
-- Detecting C compile features - done
-- Check for working CXX compiler: /usr/bin/c++
-- Check for working CXX compiler: /usr/bin/c++ -- works
-- Detecting CXX compiler ABI info
-- Detecting CXX compiler ABI info - done
-- Detecting CXX compile features
-- Detecting CXX compile features - done
-- Configuring done
-- Generating done
......
接下来配置调试参数,点击菜单 cmake -> Debug and Launch Settings -> test :
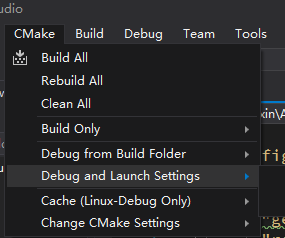
选择一个可执行程序,这里的例子为 test,会成成一个 Debug 配置文件 launch.vs.json :
{
  "version": "0.2.1",
  "defaults": {},
  "configurations": [
    {
      "type": "cppdbg",
      "name": "test",
      "project": "CMakeLists.txt",
      "projectTarget": "test",
      "cwd": "${debugInfo.remoteWorkspaceRoot}",
      "program": "${debugInfo.fullTargetPath}",
      "MIMode": "gdb",
      "args": ["a", "b"],
      "externalConsole": true,
      "remoteMachineName": "${debugInfo.remoteMachineName}",
      "pipeTransport": {
        "pipeProgram": "${debugInfo.shellexecPath}",
        "pipeArgs": [
          "/s",
          "${debugInfo.remoteMachineId}",
          "/p",
          "${debugInfo.parentProcessId}",
          "/c",
          "${debuggerCommand}",
          "--tty=${debugInfo.tty}"
        ],
        "debuggerPath": "/usr/bin/gdb"
      },
      "setupCommands": [
        {
          "text": "-enable-pretty-printing",
          "ignoreFailures": true
        }
      ],
      "visualizerFile": "${debugInfo.linuxNatvisPath}",
      "showDisplayString": true
    }
  ]
}
如果执行程序需要运行参数,需要在配置文件中添加一行 :
"args": ["a", "b"],
然后就可以按 F5 编译调试程序了: